Seeing a Dermatologist Online with SkinCheck Connect
Care From the Comfort of Your Own Home
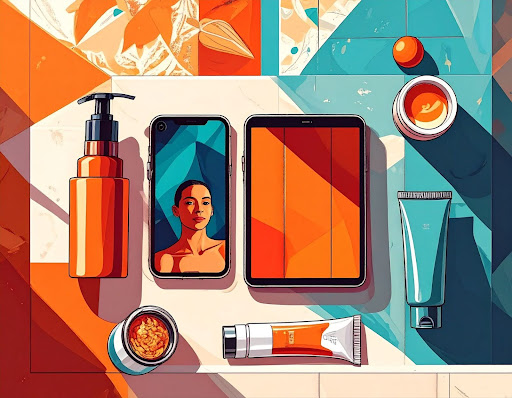
The way we access healthcare is changing, and dermatology is one of the specialties leading the way. Instead of waiting weeks or even months to be seen in a traditional clinic, patients now have the option to meet with board-certified dermatologists online, often from the comfort of their own homes. If you’ve ever wondered whether teledermatology is right for you, this guide breaks down what to expect, how it works, and how to get the best results. With tools like SkinCheck, expert care is just a few clicks away.
One of the biggest barriers to seeing a dermatologist has always been access. Between long wait times, taking time off work, or arranging transportation, the process can feel stressful before the appointment even begins. But, with HIPAA-compliant technology, secure platforms, and the ability to connect from your living room, teledermatology takes the stress out of care; no waiting rooms, no long commutes, and no need to rearrange your day. The result? A more comfortable, patient-centered experience.
What to Expect During the Intake Process
At SkinCheck, the intake process is designed to be simple, guided, and efficient. Whether you’re a first-time user or someone who’s been tracking skin concerns over time. Here’s how it works:
- Start Your Visit: Open the SkinCheck app and click “Get an Expert Diagnosis.”
- Upload Your Photos:
- Choose from previously tracked images, upload from your camera roll, or take new photos in the moment.
- Patients are prompted to capture 3–5 images of their lesion or condition.
- On-screen instructions guide you: hold your phone perpendicular to the skin, make sure only the skin is visible in the frame, and focus closely on the concern.
- Choose from previously tracked images, upload from your camera roll, or take new photos in the moment.
- Describe Your Concern:
- Name the skin issue in your own words.
- Select your skin tone for more accurate evaluation.
- Add the concern to a body region for easy tracking over time.
- Name the skin issue in your own words.
- Provide Medical Context:
- Fill out a short questionnaire covering your medical history, prior treatments, or any medications you’ve tried.
- You can also request a specific prescription if you already know what you need.
- Enter your preferred pharmacy for fast prescription delivery.
- Fill out a short questionnaire covering your medical history, prior treatments, or any medications you’ve tried.
- Confirm & Submit:
- Review your images and information.
- Pay $69.99 for the expert diagnosis.
- Submit your case securely for review by a board-certified dermatologist.
- Review your images and information.
From start to finish, the process takes only a few minutes, and patients receive feedback within 48 hours.
Prescriptions Through SkinCheck Connect
One of the most common questions patients ask is whether they can actually get prescriptions through an online dermatology visit. The answer is yes. After reviewing your photos, intake questionnaire, and medical history, your dermatologist can prescribe medications when appropriate, just like an in-person visit.
Common prescriptions available online include:
- Topical retinoids (like tretinoin) – often used for acne or to help improve skin texture and aging.
- Antibiotics – either creams or pills, for acne, rosacea, or minor skin infections.
- Steroid creams – for flare-ups of eczema, psoriasis, or other rashes.
- Antifungal treatments – creams or oral medications for common fungal infections.
- Non-steroid creams (such as tacrolimus) – for eczema or dermatitis that needs gentle care.
- Oral acne medications – like spironolactone or isotretinoin, prescribed when appropriate and according to state regulations.
Your dermatologist will recommend the treatment that’s safest and most effective for your specific condition.
Tips for Taking the Best Skin Photos
Getting clear, accurate photos helps dermatologists provide the most reliable diagnosis. Here are some extra tips to improve your images:
- Clean your camera lens: A quick wipe can remove smudges that blur details.
- Good lighting is key: Take photos in natural daylight when possible. Avoid strong shadows or overly warm/yellow indoor light.
- Photograph bare skin: Remove makeup, lotions, or sunscreen from the area so the lesion is clearly visible.
- Mirror trick: For hard-to-see areas (like the back of your arm), line your phone up with a mirror so you can check the screen while taking the photo.
- Ask for help: Have a trusted family member or friend photograph difficult-to-reach spots, like your back or shoulders.
- Take multiple angles: Submit at least one close-up, one mid-range, and one wider context shot to give the dermatologist a complete view.
- Check focus before submitting: If you’re uploading a photo from your camera roll, zoom in to confirm the spot is crisp and not pixelated.
What This Means for Your Skin
Seeing a dermatologist online is no longer an uncommon option—it’s a mainstream, secure, and effective way to get the care you need. Whether you’re managing acne, concerned about a new rash, or just want peace of mind about a changing mole, teledermatology makes it easier than ever to get answers quickly.
With less waiting, less stress, and the flexibility to connect from home, online dermatology makes care easier to fit into everyday life. SkinCheck helps bring expert care within reach, whenever and wherever you need it.

This post provides general information about teledermatology and online dermatology services. For personalized advice or concerns about specific skin conditions, please consult a licensed dermatologist or healthcare provider. SkinCheck Connect is a tool to facilitate access to care and does not replace in-person evaluation when needed.
Take Control of Your Health
Discover how SkinCheck can help you detect skin cancer early.
Discover insightful articles on various topics.
.png)